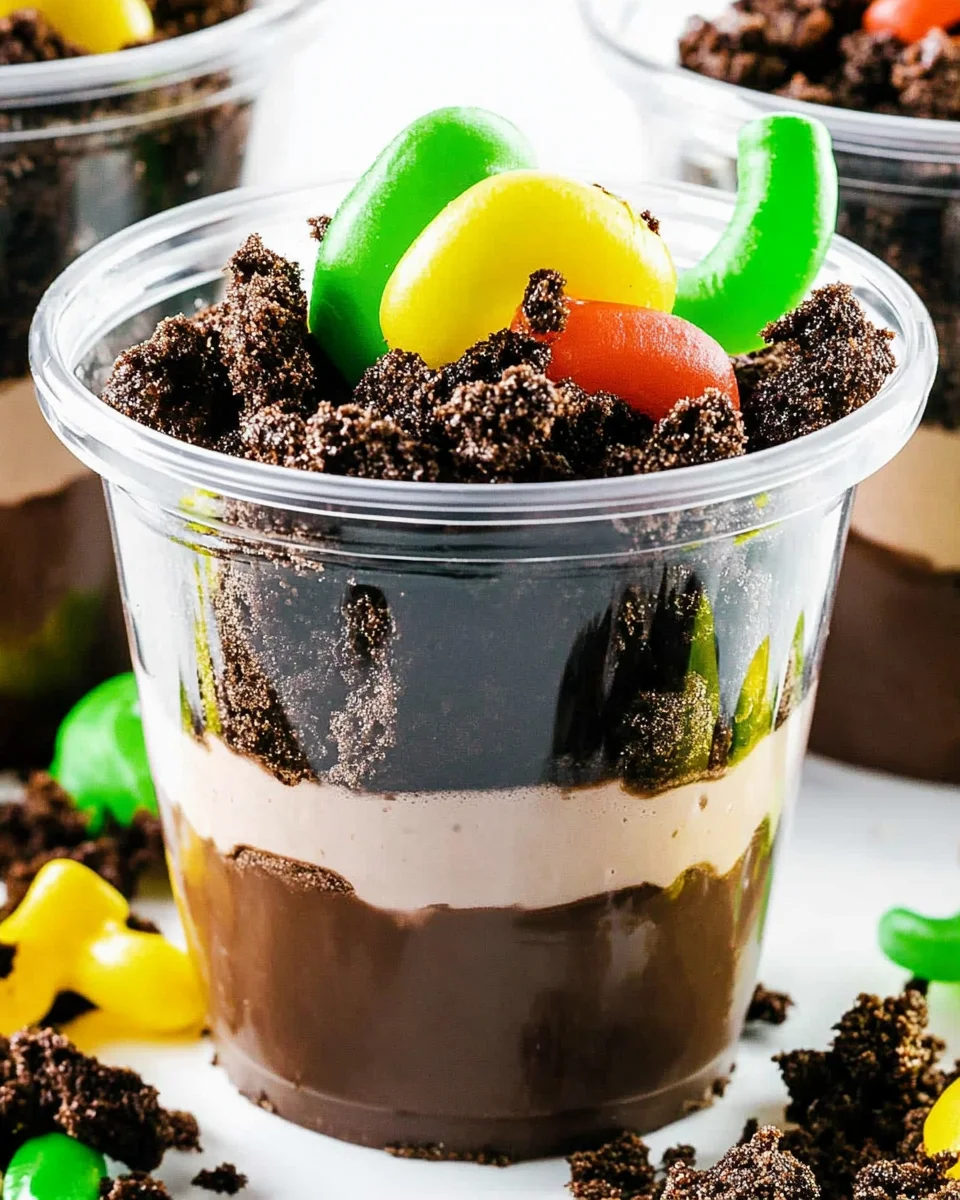
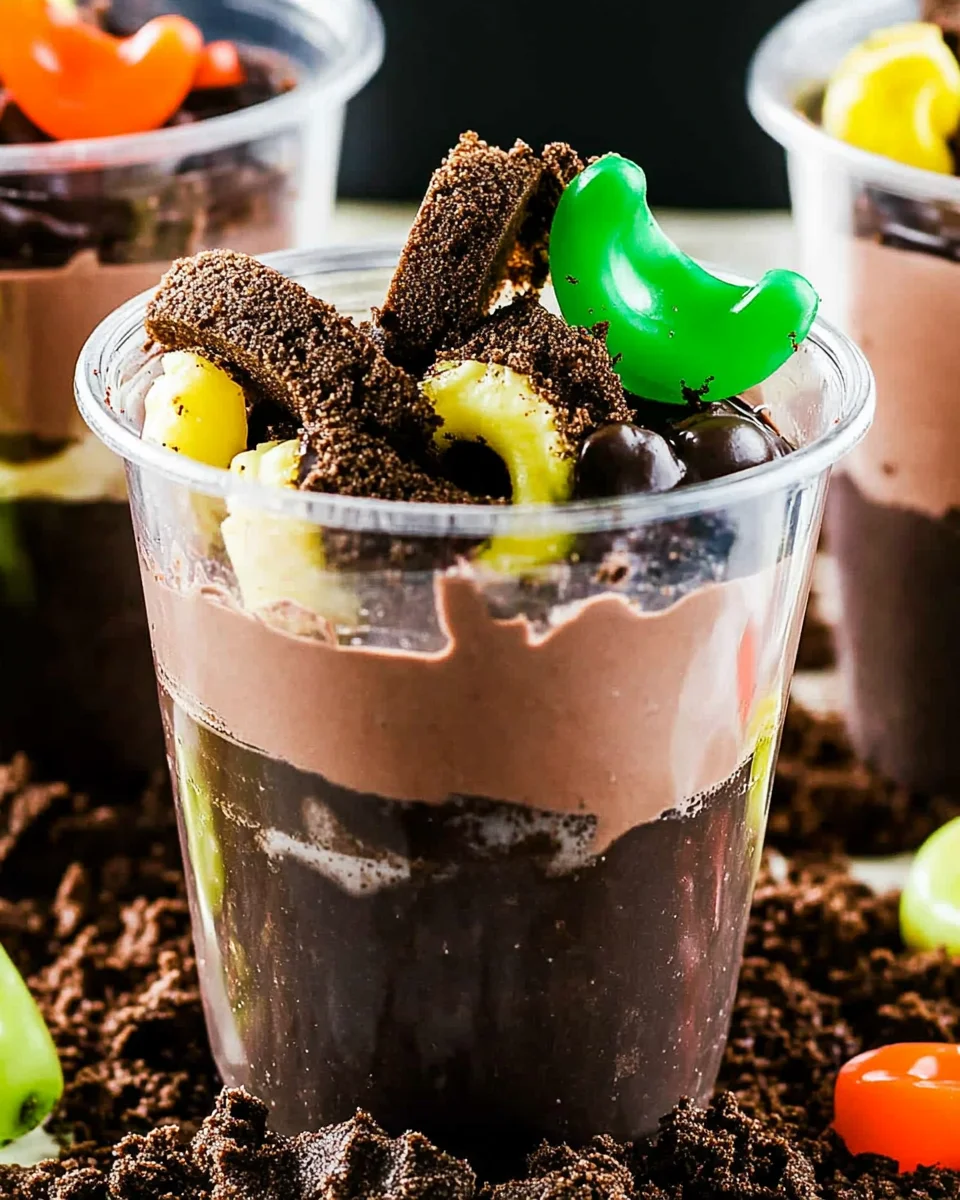
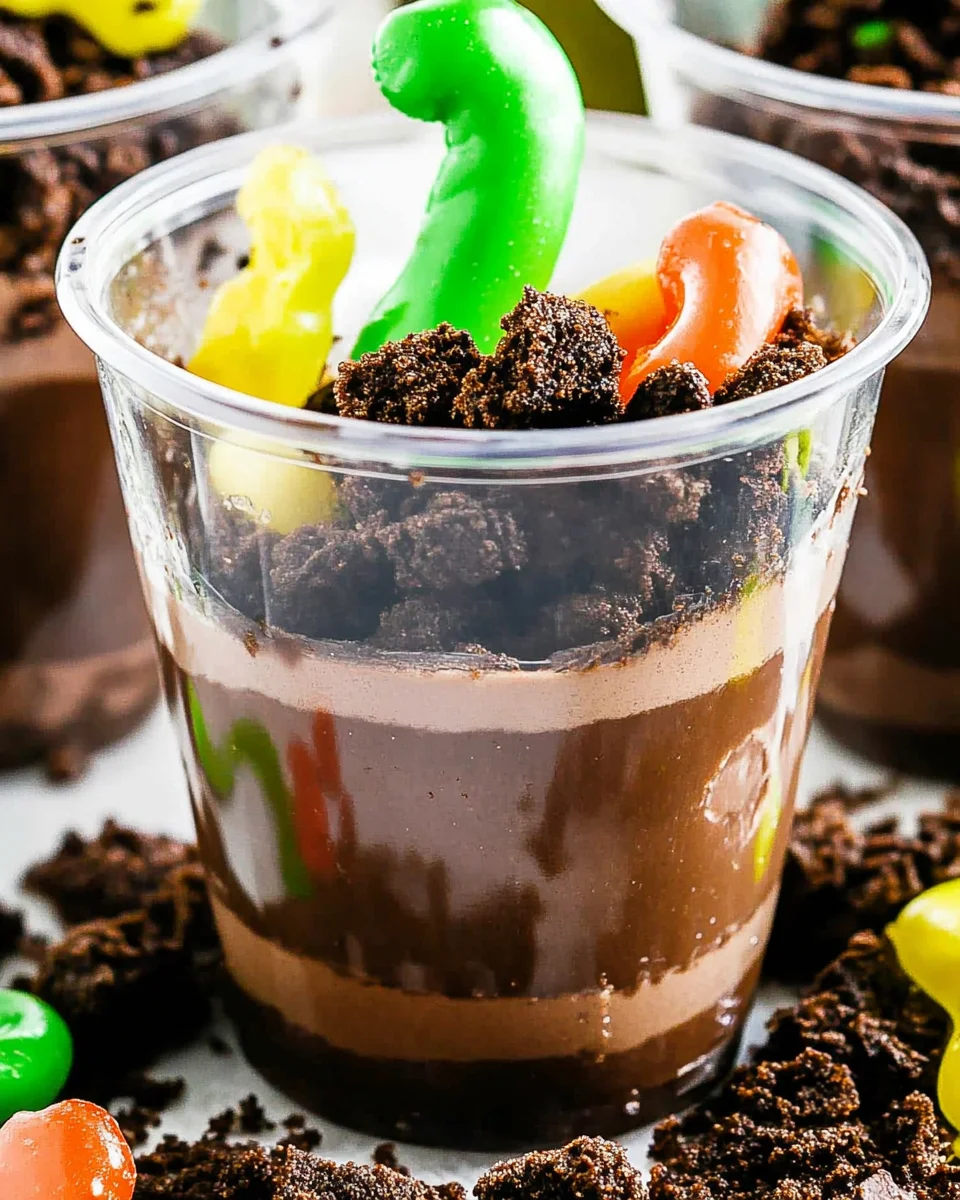
Dirt Cups are a delightful dessert that bring joy to any occasion, whether it’s a child’s birthday party or a spooky Halloween gathering. With layers of rich chocolate pudding, crushed Oreos, and gummy worms, this fun treat is sure to impress both kids and adults alike. Their playful presentation and easy preparation make Dirt Cups a favorite for those who love to indulge in sweet treats.
Why You’ll Love This Recipe
- Easy to Make: This recipe requires minimal effort, perfect for busy parents or last-minute gatherings.
- Kid-Friendly Fun: Children love the idea of digging into their own dirt, making it an exciting dessert for parties.
- Customizable Layers: Feel free to add your favorite toppings or adjust the pudding flavors for a unique twist on the classic Dirt Cups.
- Perfect for Any Occasion: Whether it’s Halloween, birthdays, or just a fun family night, these cups fit right in.
- Deliciously Indulgent: The combination of creamy pudding and crunchy Oreos creates a satisfying texture that keeps everyone coming back for more.
Tools and Preparation
To create your Dirt Cups successfully, gather some essential kitchen tools. Having the right equipment ensures a smooth preparation process.
Essential Tools and Equipment
- Mixing bowl
- Whisk
- Measuring cups
- Serving cups or glasses
- Spoon
Importance of Each Tool
- Mixing bowl: A sturdy bowl allows you to combine ingredients without spills.
- Whisk: Using a whisk ensures that the pudding mix is fully incorporated into the milk for a smooth texture.
Ingredients
Layers of chocolate pudding, crushed Oreos topped with gummy worms!
For the Pudding Layer
- 3.4 ounces box instant chocolate pudding mix
- 2 cups milk
- 8 ounces whipped topping (thawed)
For the Topping
- 10-12 Oreo cookies (crushed)
- 32 gummy worms

How to Make Dirt Cups
Step 1: Prepare the Pudding
In a medium bowl, add cold milk and sprinkle the pudding mix over top. Whisk until well combined.
Step 2: Thicken the Mixture
Let sit for 5 minutes to thicken. This step is crucial for achieving that perfect pudding consistency.
Step 3: Fold in Whipped Topping
Gently fold in the whipped topping until fully incorporated. This adds creaminess and lightness to your layers.
Step 4: Assemble in Cups
Spoon the thickened pudding into glasses or cups. Aim for an even layer to showcase the delicious dessert.
Step 5: Add Oreo Crust
Sprinkle crushed Oreo cookies on top of each cup of pudding. This provides that essential crunchy element.
Step 6: Garnish with Gummy Worms
Place 4 gummy worms on top of each cup as decoration. This fun touch makes your Dirt Cups visually appealing.
Step 7: Chill Before Serving
Chill Dirt Cups until ready to serve. This enhances flavor and allows everything to set perfectly together.
How to Serve Dirt Cups
Dirt Cups are a fun and playful dessert that can be enjoyed in various ways. You can elevate your presentation and make them even more enticing with a few creative serving suggestions.
Individual Cups
- Serve each Dirt Cup in a clear plastic cup or glass to showcase the layers of chocolate pudding and crushed Oreos.
Party Trifle
- Layer Dirt Cups in a large trifle dish for a stunning centerpiece at gatherings. Include more gummy worms and Oreos on top for decoration.
Halloween Treats
- For Halloween, add spooky decorations like edible eyes or Halloween-themed gummy candies to make your Dirt Cups more festive.
Themed Parties
- Customize your Dirt Cups for themed parties by using colored sprinkles or themed straws that match the occasion, such as bright colors for summer parties or darker tones for Halloween.
Kid-Friendly Favors
- Package individual servings of Dirt Cups in small jars and tie them with ribbon. These make great party favors for children’s birthday celebrations.
Ice Cream Sundae Style
- Transform Dirt Cups into an ice cream sundae by adding a scoop of vanilla or chocolate ice cream on top before serving. Drizzle with chocolate syrup for extra indulgence.
How to Perfect Dirt Cups
To achieve the best results with your Dirt Cups, consider these helpful tips.
-
Use chilled ingredients – Chilled milk and whipped topping help the pudding set faster, enhancing texture.
-
Properly crush Oreos – Use a food processor or a rolling pin to crush Oreos into fine crumbs for even distribution on top.
-
Layer thoughtfully – Create distinct layers of pudding and crushed cookies to mimic actual dirt. This adds visual appeal.
-
Gummy worm placement – Position gummy worms so they look like they are crawling out of the “dirt” for an added fun effect.
-
Chill before serving – Allow your completed Dirt Cups to chill in the fridge for at least 30 minutes before serving. This enhances flavors and textures.
Best Side Dishes for Dirt Cups
Dirt Cups are sweet enough on their own, but pairing them with complementary side dishes can create a delightful dessert experience.
-
Fruit Skewers – Fresh fruit skewers provide a refreshing contrast to the rich flavors of the Dirt Cups. Choose colorful fruits like strawberries and grapes.
-
Chocolate Chip Cookies – A classic treat that pairs well. Offer them alongside for guests who want an additional cookie crunch.
-
Mini Cheesecakes – Bite-sized cheesecakes add a creamy texture that’s perfect against the crunch of Oreos in Dirt Cups.
-
Ice Cream Cones – Serve mini ice cream cones as an extra fun touch. They can be filled with soft-serve ice cream or served plain for scooping.
-
Pudding Shots – Create small pudding shots in flavors like vanilla or banana for variety that complements the chocolate flavor of the Dirt Cups.
-
Brownie Bites – Rich brownie bites provide another chocolatey option that enhances the overall dessert theme without overwhelming guests.
Common Mistakes to Avoid
When making Dirt Cups, it’s easy to overlook some details. Here are common mistakes to watch out for:
-
Using warm milk: Always use cold milk when preparing the pudding. Warm milk can prevent the pudding from thickening properly.
-
Not letting pudding thicken: Allow the pudding mixture to sit for at least 5 minutes. Skipping this step can result in a runny texture.
-
Overmixing whipped topping: Gently fold in the whipped topping instead of stirring vigorously. This keeps the mixture light and airy.
-
Skipping the chilling step: Chill your Dirt Cups before serving. This enhances flavor and ensures a delightful, refreshing dessert.
-
Neglecting portion control: Ensure you have enough cups or glasses for serving. It’s easy to underestimate how much each serving will fill.
Refrigerator Storage
- Store Dirt Cups in an airtight container.
- They can be kept in the refrigerator for up to 3 days.
- Make sure they are well covered to prevent drying out.
Freezing Dirt Cups
- Freezing is not recommended: The texture of whipped topping does not hold up well after freezing.
- If you must freeze them, store in an airtight freezer-safe container for up to 1 month.
- Thaw in the refrigerator overnight before serving.
Reheating Dirt Cups
- Oven: Reheating isn’t needed as this dessert is served cold.
- Microwave: Avoid microwaving; it will ruin the texture.
- Stovetop: Not applicable; serve chilled directly from the fridge.
Frequently Asked Questions
What are Dirt Cups?
Dirt Cups are a fun dessert made with layers of chocolate pudding, crushed Oreos, and gummy worms. They are popular among kids and adults alike for their playful presentation.
Can I make Dirt Cups ahead of time?
Yes, you can prepare Dirt Cups a day in advance. Just store them in the refrigerator until you’re ready to serve for optimal freshness.
How can I customize my Dirt Cups?
You can customize your Dirt Cups by adding different toppings like sprinkles, other candy types, or even fruit for an extra twist!
Are there vegan options for Dirt Cups?
Absolutely! You can use dairy-free pudding mix and coconut whipped cream to create a vegan version of these delightful treats.
What occasions are best for serving Dirt Cups?
Dirt Cups are perfect for birthday parties, Halloween gatherings, or any casual get-together where fun desserts are welcomed!
Final Thoughts
Dirt Cups are not only easy to make but also incredibly versatile. Their charming layers and playful toppings make them a favorite among all ages. Feel free to customize your cups with various candies or toppings to suit any occasion! Enjoy creating this delightful treat that brings joy to everyone who tries it.
Dirt Cups
- Total Time: 15 minutes
- Yield: Makes approximately 4 servings 1x
Description
Dirt Cups are a whimsical and delightful dessert that captures the essence of childhood fun. Perfect for parties or casual family gatherings, these layered treats combine rich chocolate pudding, crunchy crushed Oreos, and playful gummy worms to create an enticing presentation that appeals to all ages. With minimal preparation required, Dirt Cups are an ideal choice for busy parents or last-minute gatherings. Customize them with your favorite toppings or adapt them for themed events, making them a versatile addition to any dessert table. Whether you’re celebrating a birthday or enjoying a spooky Halloween night, these delightful cups promise to bring joy and indulgence to every occasion.
Ingredients
- 3.4 ounces instant chocolate pudding mix
- 2 cups cold milk
- 8 ounces whipped topping (thawed)
- 10–12 Oreo cookies (crushed)
- 32 gummy worms
Instructions
- In a medium mixing bowl, whisk together cold milk and pudding mix until well combined.
- Let the mixture sit for 5 minutes to thicken.
- Gently fold in the whipped topping until fully incorporated.
- Spoon the thickened pudding into serving cups, creating even layers.
- Sprinkle crushed Oreos on top of each cup.
- Garnish with gummy worms for a fun presentation.
- Chill in the refrigerator before serving.
- Prep Time: 15 minutes
- Cook Time: 0 minutes
- Category: Dessert
- Method: No-Cook
- Cuisine: American
Nutrition
- Serving Size: 1 cup (150g)
- Calories: 310
- Sugar: 24g
- Sodium: 160mg
- Fat: 16g
- Saturated Fat: 7g
- Unsaturated Fat: 9g
- Trans Fat: 0g
- Carbohydrates: 39g
- Fiber: 2g
- Protein: 4g
- Cholesterol: 15mg
Keywords: For added creativity, consider using different flavored puddings or toppings like sprinkles. To make this dessert vegan-friendly, opt for dairy-free pudding mix and coconut whipped cream.